How do I setup OBS/Streamlabs Desktop/Stream Elements OBS with BEACN Mix Create?Updated 4 months ago
Setting up BEACN Mix Create in OBS for the first time is really simple. This article is a readable version of the video above.
OBS/SLOBS/Stream Elements:
This article uses OBS 28, but these steps work the same in Streamlabs Desktop as well as the Stream Elements plugin for OBS. Note that while the buttons may be in a slightly different location, the menus will largely be the same.
In order to get the submixing feature, your BEACN combines of your channels into something we call "Audience Mix." This combines all of the programs, levels, and routing table considerations you've configured for your Audience Mix in the BEACN App.
Hop into OBS Settings, click on Audio, and Disable EVERYTHING. Then, in Mic/Auxiliary, set it to be Audience Mix.

If this is the first time you're setting up OBS, you're done with the audio portion. If not, or if you want to set up the VOD Track, See the next section below.
Next, let's set up the VOD Track feature. For those who don't know what the VOD Track feature is, the VOD Track was introduced by Twitch in 2021. In essence, it gives you two tracks of audio to send to Twitch. The first track is your Live Track and the second track is your Clips/VOD Track. This is useful for many reasons. First, there is a lot of music that is royalty-free for streaming, but not for on demand. This helps you stay within compliance against DMCA claims. Second, it gives you control over what your audience hears on other platforms. For example, if you export your Twitch Clips to TikTok, you can set everything up so that your music isn't included and your alerts sounds aren't drowning you out.
Setting up the VOD Track has a few extra steps to it, but it's really manageable. First, let's go back to OBS Settings > Audio. We should still only have Audience Mix as a Mic/Aux device. Let's go to Mic/Aux 2 and let's add VOD Track there.

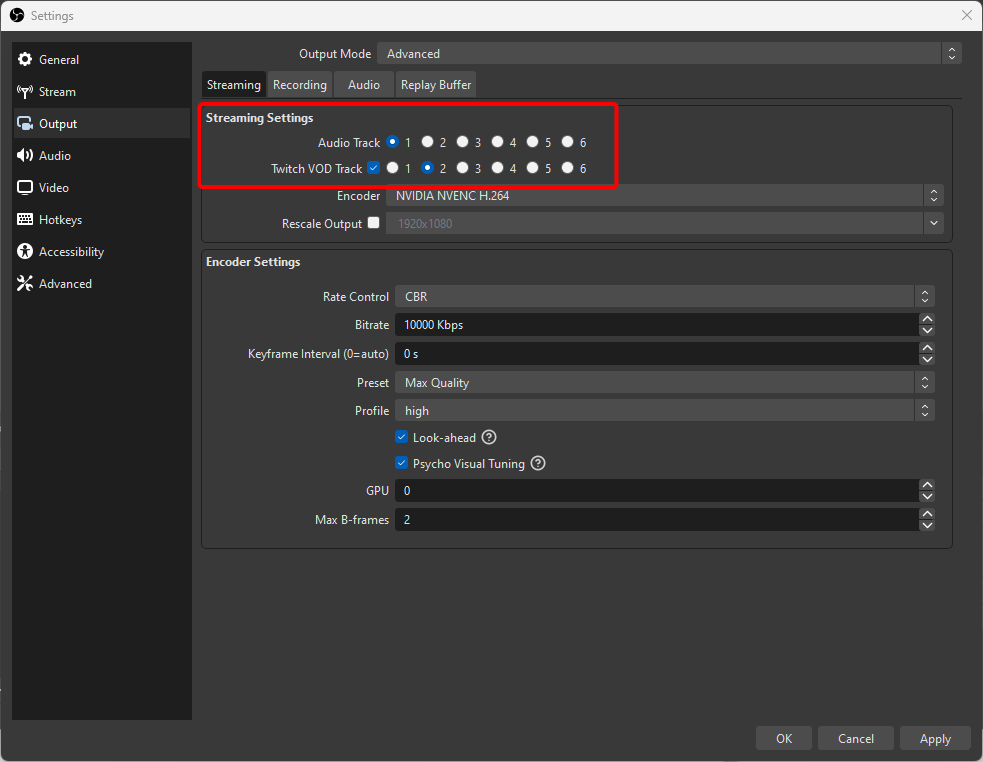
Next, we're going to go to Output Tab and we're going to set Audio Track to 1, Enable Twitch VOD Track and set it to 2. What we've just done is told OBS that our live track is on Track 1, and our VOD Track is on Track 2.
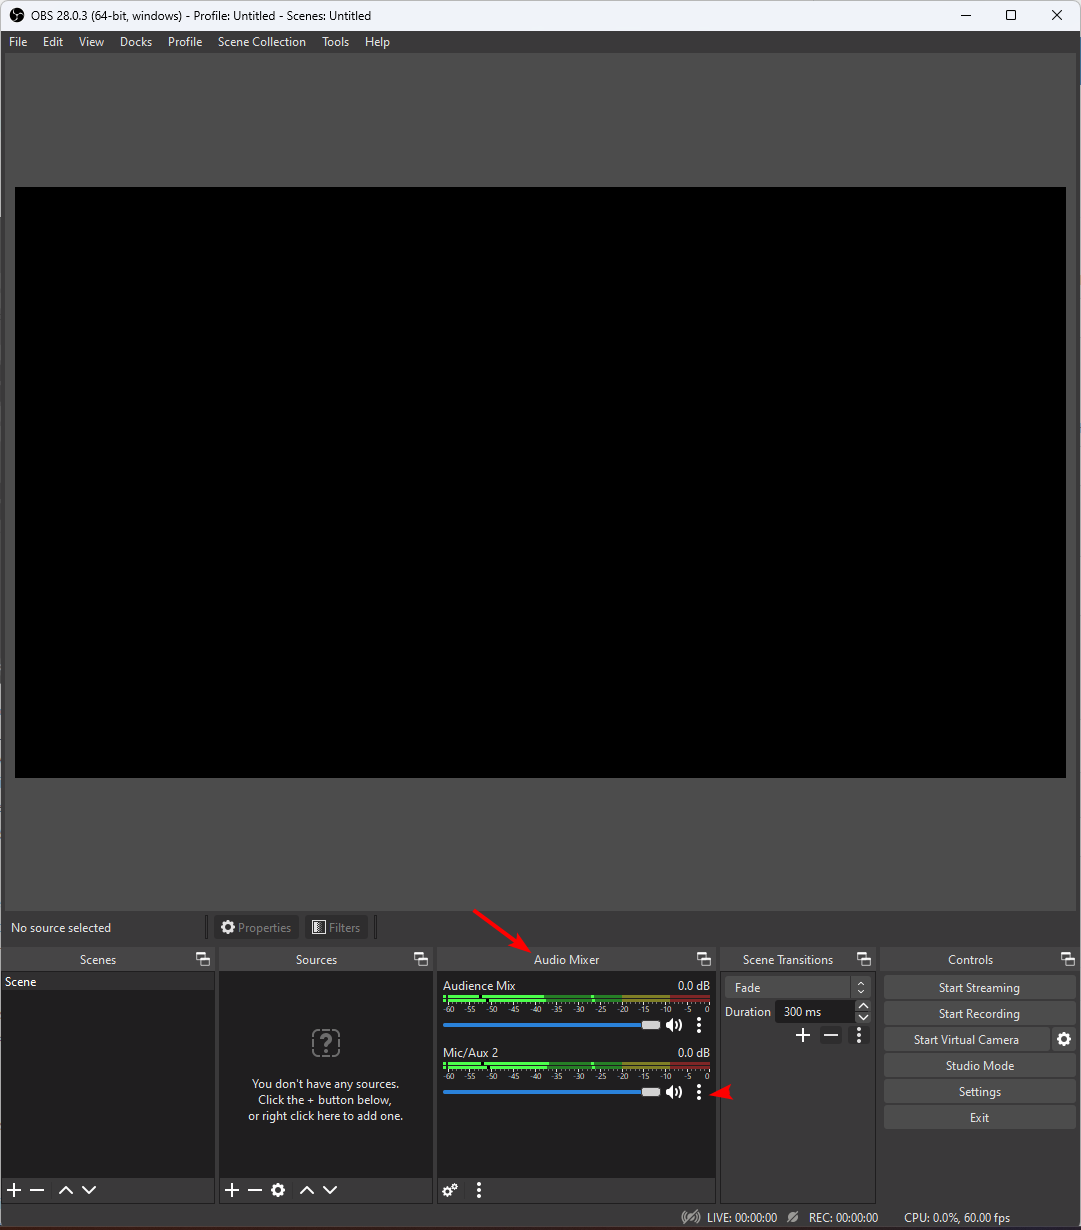
Now we need to tell OBS which sources to put on each track. To do this, we're going to go to the main OBS window, and in your Audio Mixer, click on the little cogwheel.
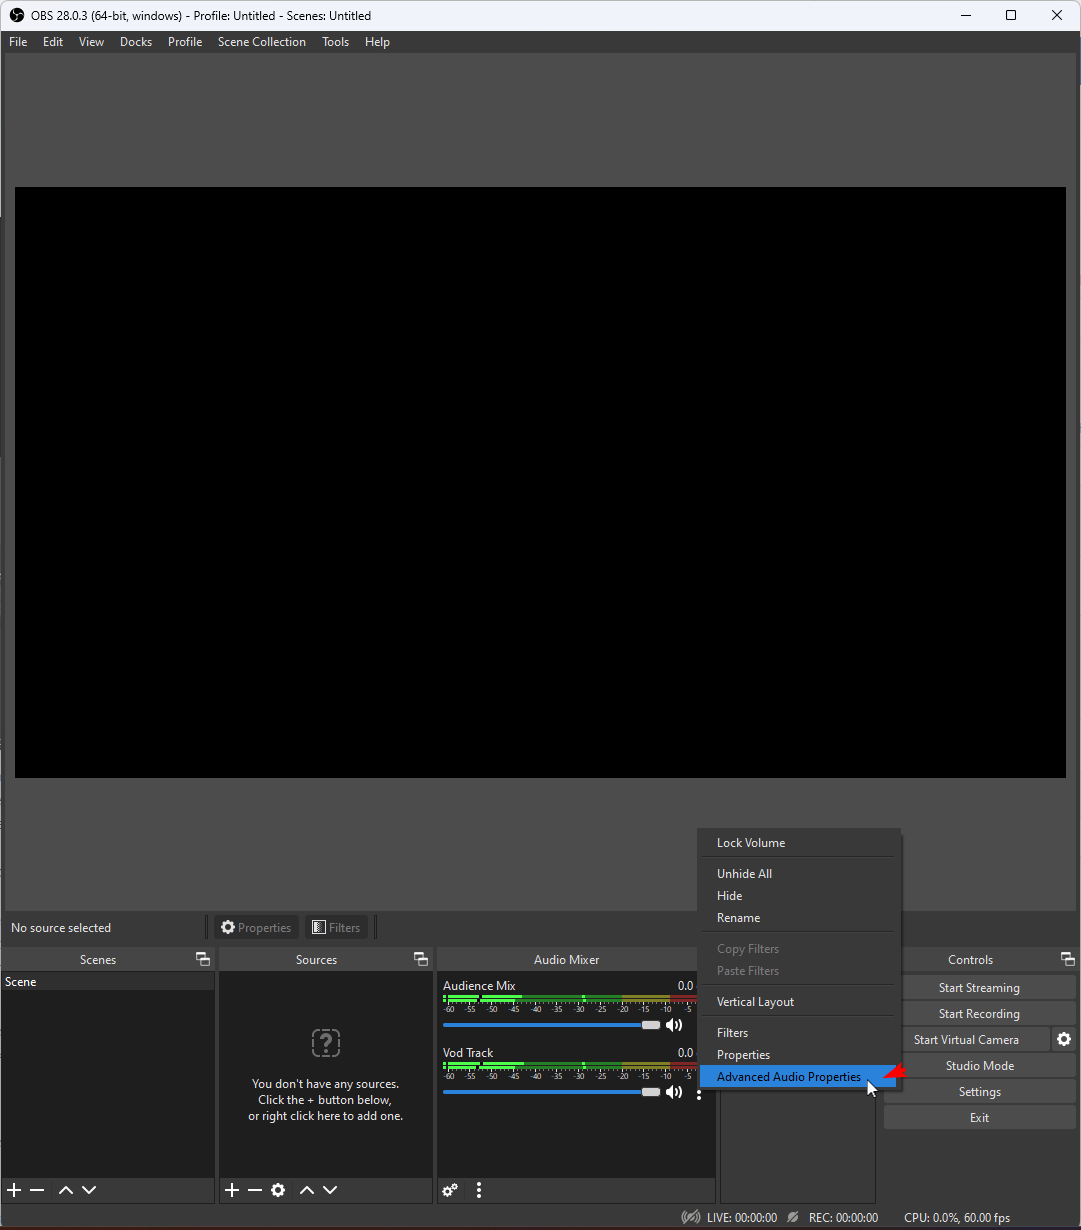
Let's rename our 2 audio sources to Audience Mix and VOD Track just so we don't get confused later on. From there, we're going to click on Advanced Audio Properties.
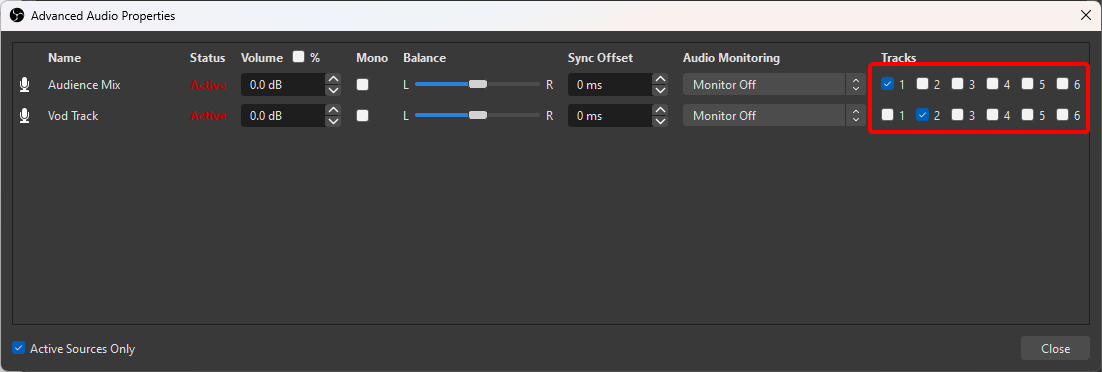
From here, you'll want to reset everything to Monitor Off and uncheck everything in this little checkbox matrix here. Then, for Audience Mix, select ONLY Track 1 and your VOD Track, select ONLY Track 2. Because everything should be coming through your Audience Mix or VOD Track sources, you shouldn't need to do anything fancy here for 95% of creator setups.
Okay, so you've set up everything correctly but something isn't working right. In most cases, it's because you've got some residual settings from your previous audio setup. OBS doesn't remove these settings unless you've created an entirely new Scene Selection which you likely haven't. Let's go through the most popular issues:
My Audio Doesn't Sound as good On Stream. It cuts out or sounds underwater.
This is the most popular issue we see and it almost always is because you had extra filters set up on your previous audio setup. Click on the cogwheel beside Audience Mix and VOD Track and click on Filters. Make sure there is nothing in this list.
My Audio sounds doubled
If this happened to you, go back to earlier in the video where we set up the different tracks in Advanced Audio Properties. If that didn't resolve it, let's double check your OBS Audio Settings. Sometimes "Default" looks like "Disabled."
Another thing you may have setup is an Audio Input or Audio Output capture that is causing some or all of your sources to double. This can also lead to a warbly underwater effect or even audio cutting in and out.
How do I add or remove audio sources?
A really popular question we get is how can I manually add/remove sources? This is where the Routing Tables and Mute Modes come in.
Another important thing to note is that if a source is not included in your Audience Mix, it cannot be included in your VOD Track. This is so you don't have something muted to your Audience that magically shows up on your VODs and Clips later.
Setting up your BEACN Products in OBS is super straightforward, but there's a lot of places to check and uncheck if you've been streaming for a while. Hopefully the video and this article helped you out. If you still have questions, please reach out to us via the submit a request button at the bottom of support.beacn.com or our Discord at discord.gg/BEACN.