Getting Started with BEACN MicUpdated 2 months ago
Before You Start
BEACN Mic requires the BEACN App software to take full advantages of all features during your initial setup, so make sure to follow all of the steps in this article.
Don't have BEACN Mic? Click here to learn more.
To download the BEACN App, click here.
Download the Installer and follow the on-screen prompts.
- Plug one end of the USB-C cable into the back of BEACN Mic.
- Plug the other end of the USB-C cable into your computer. Use the provided USB-C to USB-A adapter if needed.
- Plug your headphones into the back of BEACN Mic. Use the provided headphone extension cable if needed.
- Wait for the light-up sequence on your BEACN Mic to confirm that it is ready to use with the BEACN App.
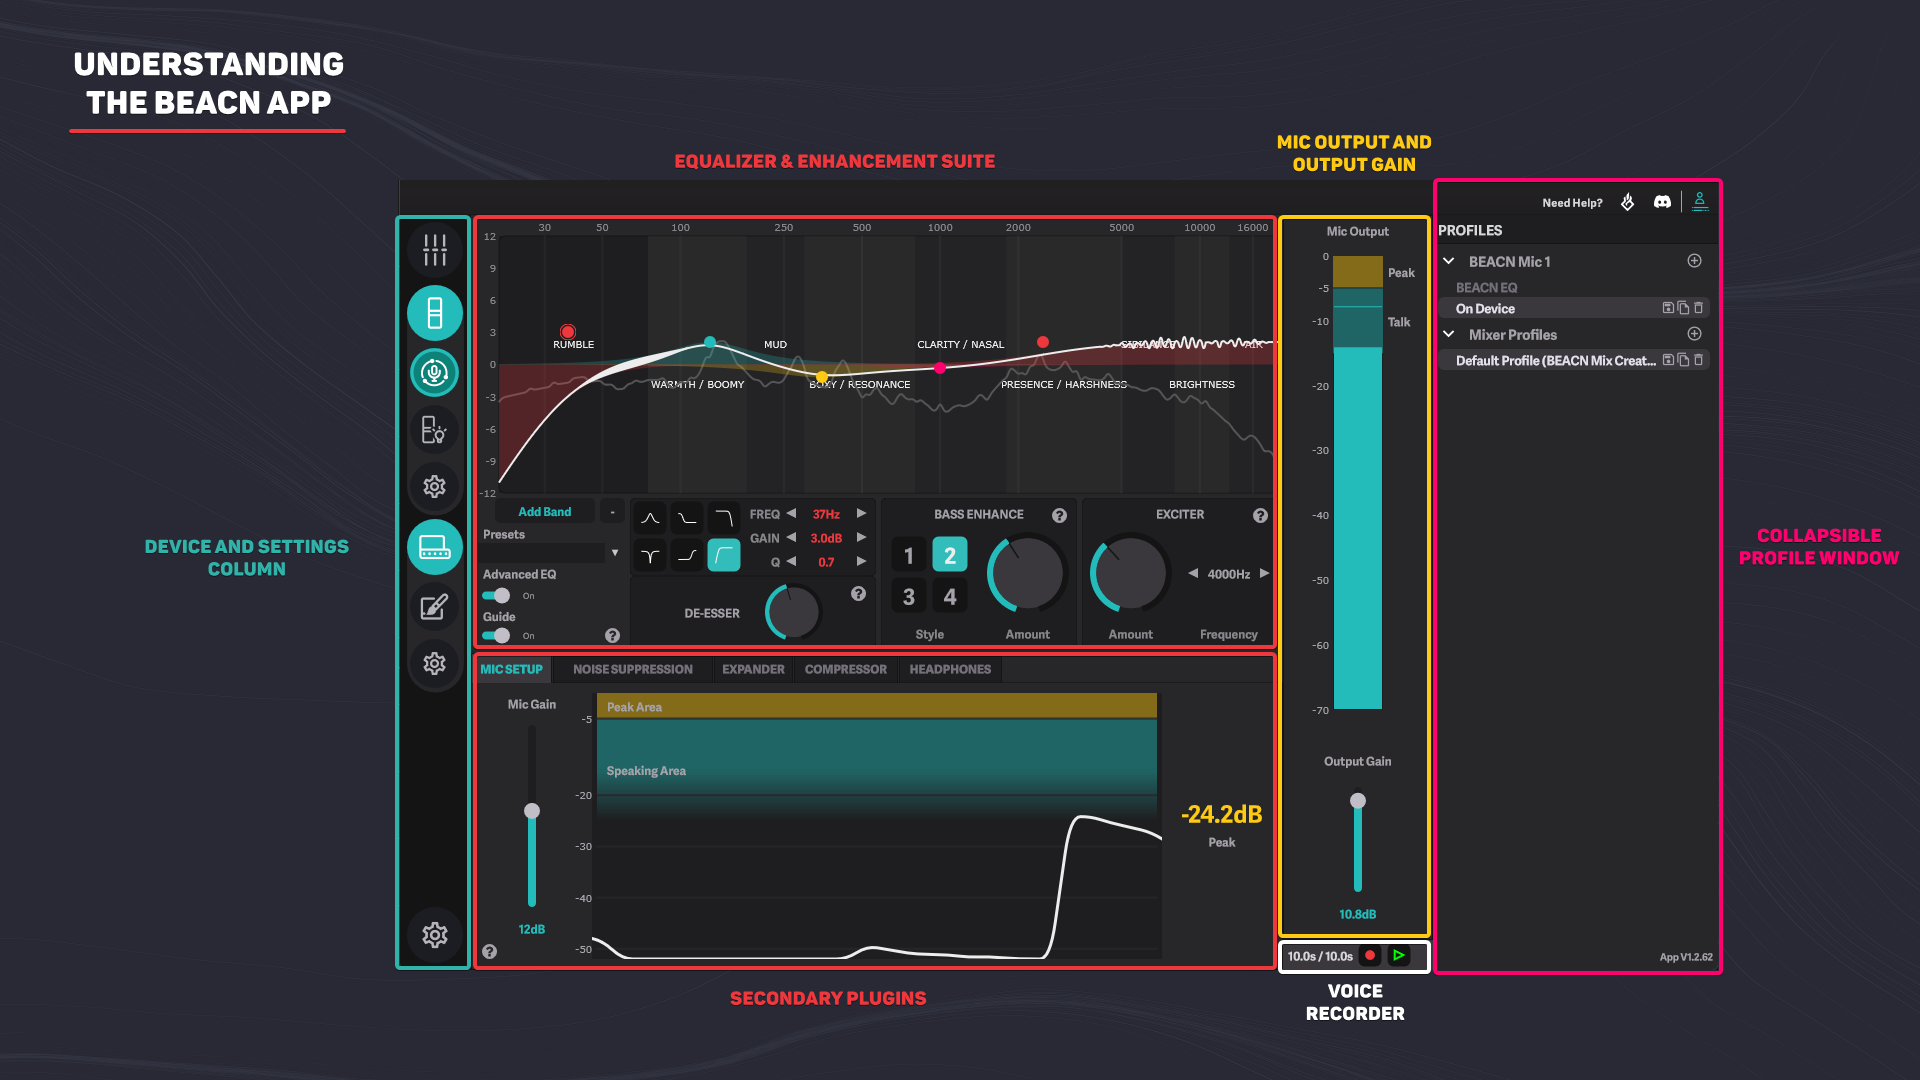
DEVICE AND SETTINGS COLUMN
The Device Column displays all connected devices and their various modules. Clicking on the device icon will expand/contract the device modules to save space.
EQUALIZER AND ENHANCEMENT SUITE
If and when creators need to adjust their microphone settings, most of the time it is done through the equalizer and enhancement suite. We have this anchored to the top of the window so it is always accessible.
SECONDARY PLUGINS
While no less important, secondary plugins are adjusted less often than the equalizer and therefore are placed in a tabbed view down below.
MIC OUTPUT AND OUTPUT GAIN
The Mic Output and Output Gain are the end of a user’s microphone chain. The Mic Output meter tells you exactly how loud you are coming in to your computer. The Output Gain gives users an additional volume boost if they are too quiet.
VOICE RECORDER
The Voice Recorder lets users record up to a 10 second clip that will be replayed through their microphone chain. Changes made to the user’s microphone chain are reflected in real time so a user doesn’t need to continue speaking to hear how their adjustments sound.
COLLAPSIBLE PROFILE WINDOW
The Profile Window is where users can Add, Remove, Save, and Duplicate their Profiles. Profiles are designed to help users be able to quickly and easily switch between various audio setups.
MOUNTING BEACN MIC
BEACN Mic has a handy mounting mechanism that utilizes two rings that give users more control over orienting and tightening their microphone. The top “ribbed” ring should be affixed as tightly as possible to your boom arm. You don’t need to twist your microphone. The bottom “smooth” ring can be tightened or loosened to adjust the resistance of the microphone swivel so you can dial it in just right. BEACN Mic also fits most common types of microphone stand threadings.
SETTING UP BEACN MIC IN WINDOWS
In Windows, set Microphone (BEACN Mic) as your Default Recording Device and set Headphones (BEACN Mic) as your default playback device.
To view Legal Information relating to BEACN Mic, head to our Legal Documentation section.
BEACN Mic has a 2-year limited warranty for hardware failures. For more warranty information, check out our Warranty article. If the user has software or setup support inquiries, we will support those for free via our website ticketing system or our public Discord server.